Skip to content

Choose a Site for Your Garden

Choose a Site for Your Garden

Introduction

Gardening is about more than just planting seeds--it's about nurturing life and helping it flourish.

The first and most important part of this journey is finding the right spot for your garden.

Whether you're envisioning a lush vegetable patch, a fragrant herb garden, or a vibrant bed of flowers, your garden's success starts with choosing the ideal location.

Get the eBook 👈

Assessing Sunlight and Shade

☀️ When it comes to gardening, sunlight is everything.

Picking the right spot for your plants can make all the difference.

The amount of light your garden gets can really affect how well your plants grow.

That's why it's important to know how much sunlight different plants need and how to figure out the light levels in your garden.

Full Sun, Partial Sun, and Shade

Every plant has its own sunlight needs, and they generally fall into three categories:

Full Sun

These plants love soaking up the sun, needing 6 to 8 hours of direct sunlight each day.

🍅 Think of vegetables like tomatoes, peppers, and cucumbers.

Many flowering plants also thrive in full sun.

Partial Sun/Partial Shade

Plants in this group prefer about 3 to 6 hours of sunlight per day.

They can handle some direct sunlight but appreciate a break in the hottest part of the day.

🌿 Leafy greens like lettuce and spinach, along with herbs such as parsley and mint, are great examples.

Shade

😎 Shade-loving plants are happiest with less than 3 hours of direct sunlight a day.

They often do well in dappled light or spots with morning sun and afternoon shade.

Hostas, ferns, and impatiens are all good choices for those shadier areas.

By getting familiar with these categories, you'll be able to match your plants with the light conditions in your garden, helping them grow strong and healthy.

Check It Out!

How to Evaluate Your Yard for Sunlight

Now that you understand how vital sunlight is, the next step is to get a clear picture of the light conditions in your chosen garden spot.

This isn't something you can observe just once; it requires careful monitoring throughout the day and, ideally, throughout the changing seasons.

Mapping Sunlight Patterns

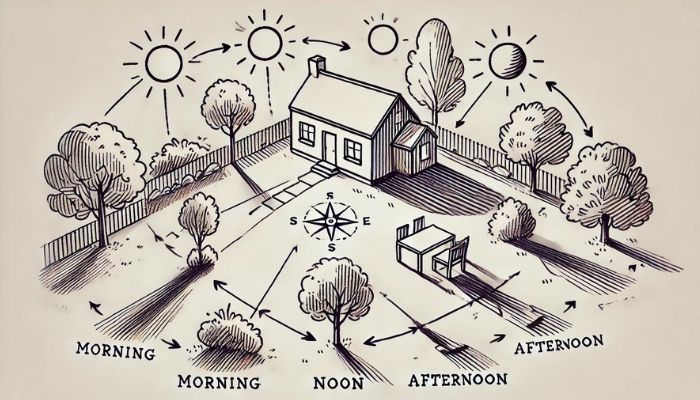
🌤 A great way to understand the sunlight in your garden is to start early in the morning.

Pay attention to where the sun's first light touches.

After that, check back a few more times during the day--late morning, around noon, mid-afternoon, and towards the evening.

As the hours pass, you'll notice which parts of your garden get the most light and where the shadows start to take over.

One important thing to keep in mind is that during the cooler months or winter, the sun hangs lower in the sky.

This can cause longer shadows and shift the light patterns in your garden.

Creating a Sun Map

To keep track of what you observe, sketch a simple map of your garden.

Mark the areas that get sun at different times of the day and during different seasons.

⛅️ Evaluating your garden's sunlight patterns is a crucial step that will guide many of your future decisions, from choosing the right plants to planning your garden layout.

Taking the time to do this properly ensures your plants get the light they need for healthier growth and more bountiful harvests.

Use this space to sketch out your own sun map.

^_^

Creating a Sun Map for Your Garden

Tailoring Your Plant Choices to Sunlight Patterns

Now that you've mapped out how the sunlight moves across your garden, it's time to think about how this will guide your planting decisions.

Full Sun Areas

These are the sunniest spots in your garden, perfect for plants that thrive in direct sunlight.

🍅 Think of sun-loving varieties like tomatoes, peppers, cucumbers, sunflowers, and marigolds.

These plants need about 6 to 8 hours of sunshine each day to really flourish, so place them in the areas you identified as getting the most light throughout the day.

Partial Sun/Partial Shade Areas

These spots are great for plants that enjoy a little sunshine but also appreciate some shade, especially during the hottest part of the day.

🍃 Leafy greens like lettuce, kale, and spinach, along with herbs like basil and parsley, are perfect for these zones.

They’ll thrive in areas that get a mix of sun and shade.

Shade Areas

For the shadier parts of your garden, look for plants that can do well with less sunlight.

Hostas, ferns, and impatiens are fantastic choices.

🪴 These plants are happy in areas that only get a few hours of morning sun or dappled light throughout the day.

By matching your plants to the right light conditions, you’re setting up your garden for success, ensuring everything grows healthy and vibrant.

Understanding and Using Microclimates

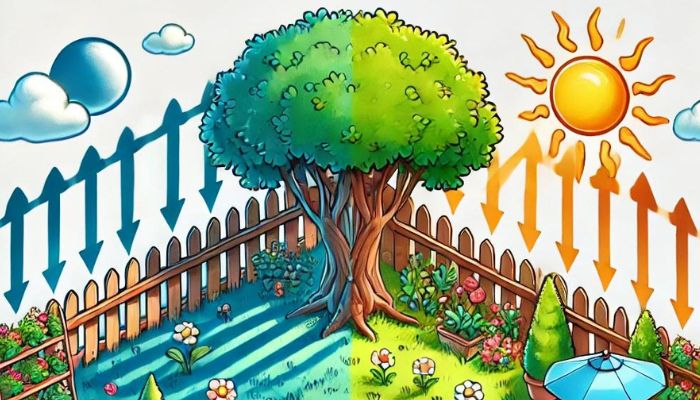
As you explore your garden, you might notice small spots where the conditions feel a bit different from the rest—these are known as microclimates.

They’re usually created by structures, trees, or other elements that block wind or cast shade, creating little pockets with their own unique environments.

Making the Most of Structures

🌴 Things like fences, walls, or large trees can create microclimates by offering protection from the wind or providing shade.

You can take advantage of this by planting shade-loving plants or those that need shelter from strong winds in these areas.

Boosting Sunlight

If there are spots in your garden that aren’t getting as much sunlight as you'd like, there’s a simple fix: use reflective surfaces.

Light-colored walls or garden mirrors can help bounce sunlight into those areas, making them brighter and more suitable for plants that need a little extra light.

Understanding and Using Microclimates

Understanding Your Garden Soil

Soil isn’t just dirt—it’s a living, breathing blend of minerals, organic matter, water, and air, all of which are essential for healthy plants.

The type of soil you have plays a huge role in how well your plants will grow.

What’s in Your Soil?

Soil is made up of three main particles: sand, silt, and clay.

The balance between these particles determines your soil's texture and how well it holds water and nutrients.

Sandy Soil

Sandy soil is made of larger particles, which let water drain quickly.

💦 While this is great for avoiding waterlogging, it also means the soil dries out faster, so you’ll need to water more often.

On the plus side, sandy soil is light and easy to work with, making it a great choice for root veggies like carrots and potatoes.

Clay Soil

Clay soil, on the other hand, has tiny, tightly packed particles that hold onto water really well.

The downside is that it can become compacted and tough to work with.

However, it’s nutrient-rich, which makes it a good option for moisture-loving plants like beans and brassicas—as long as you improve the drainage.

Loam Soil

Loam is what many gardeners consider the “ideal” soil.

It’s got a good balance of sand, silt, and clay, meaning it holds moisture and nutrients well but still allows for proper drainage.

Most plants thrive in loamy soil, which is why gardeners often call it "black gold."

Plan Your Garden in 60 Seconds!

Sign up for FREE and start using the Grow Now Garden Planner to save TONS of time.

Getting to Know Your Soil

Before you start planting, it’s important to understand your soil’s composition and quality

The good news is, you can figure this out with a few simple at-home tests.

Soil Texture Test

One of the easiest ways to check your soil’s texture is with the jar test.

Here’s what you do:

Fill a Jar: Grab a jar and fill it about halfway with soil from your garden.

Add Water: Top it off with water, leaving a little space at the top, and give it a good shake to mix everything up.

Let it Settle: Set the jar down and let it sit for a few hours until the soil separates into layers.

Observe the Layers: After the soil settles, you’ll see three distinct layers.

Sand will be at the bottom, silt in the middle, and clay on top.

Understanding Your Results

Once the soil has settled, here’s what you’ll see:

Sand: It sinks to the bottom because it’s the heaviest.

Silt: This makes up the middle layer.

Clay: It floats to the top since it’s the lightest.

For most plants, the ideal soil is loam, which is roughly 40% sand, 40% silt, and 20% clay.

This mix strikes a good balance, allowing for proper drainage while still holding onto enough moisture and nutrients to support healthy plant roots.

Knowing your soil’s texture helps you make better decisions when preparing it for planting, ensuring your garden starts off strong.

Testing Soil pH

Adjusting Your Soil for Better Growth

If your soil has more than 50% sand, it may drain too quickly, making it hard for the soil to hold onto water.

On the flip side, if there’s over 30% clay, the soil can become compacted, which makes it tough for roots to grow properly.

In both cases, adding organic matter like compost can help.

It not only improves the texture but also adds valuable nutrients, giving your soil a better balance.

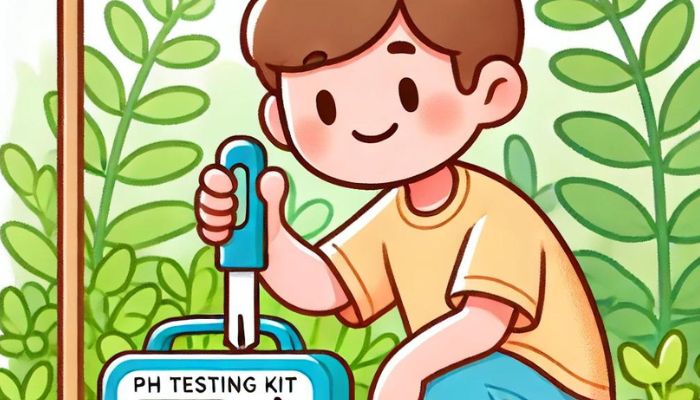
pH Testing

Another key thing to check is your soil’s pH.

This measures how acidic or alkaline the soil is, and it directly impacts how well plants can absorb nutrients.

Most garden plants prefer a pH between 6.0 and 7.0.

Luckily, testing your soil’s pH is easy—you can use a simple kit from your local garden center or a digital pH meter.

Understanding and tweaking your soil’s pH can make a big difference in how your plants grow, ensuring they get the nutrients they need to thrive.

Improving Your Soil the Easy Way

Improving your soil doesn’t have to be complicated or overwhelming.

Adding Organic Matter

Organic matter is key to creating healthy soil.

By adding things like compost, aged manure, or leaf mold, you can significantly boost the quality of your soil.

Organic matter helps sandy soil hold more moisture and allows clay soil to drain better, giving your plants a healthier environment to grow in.

Compost

Compost is full of nutrients and helpful microorganisms.

It improves the texture of the soil, helps sandy soils retain water, and improves drainage in clay soils.

A good rule of thumb is to mix a few inches of compost into the top 6-8 inches of soil before you plant.

This creates a nutrient-rich layer that helps plants thrive.

Aged Manure

Aged manure is another great option for enriching your soil.

It provides essential nutrients like nitrogen, phosphorus, and potassium.

Just make sure it’s well-aged so it doesn’t overwhelm your plants with too much nitrogen, which could burn them.

Leaf Mold

Leaf mold, made from decomposed leaves, is fantastic for improving soil structure.

It holds moisture well and adds valuable organic matter, making it great for both sandy and clay soils.

Mixing it into your garden beds helps create a balanced and fertile space for your plants to grow.

Check It Out!

Sign up for FREE and start using the Grow Now Garden Planner to save TONS of time.

Adjusting Your Soil's pH

If your soil’s pH is outside the ideal range of 6.0-7.0, don’t worry—you can adjust it to better suit your plants’ needs.

Raising pH (Reducing Acidity)

If your soil is too acidic, you can raise the pH by adding lime (ground limestone).

The amount you’ll need depends on your soil type:

Sandy Soil: For sandy soils, you’ll need about 3-5 pounds of lime per 100 square feet to raise the pH by one point. Sandy soils are lighter, so they require less lime.

Loamy Soil: For loam, which has a more balanced texture, you’ll need around 7-10 pounds of lime per 100 square feet for the same pH adjustment.

Clay Soil: Clay soils are denser, so they need more lime.

Aim for 8-12 pounds per 100 square feet to raise the pH by one point.

How to Apply Lime

Once you know how much lime to use, mix it thoroughly into the top 6-8 inches of soil.

After that, water the area well to help the lime start adjusting the pH.

Keep in mind that pH adjustments don’t happen overnight—it takes time for the lime to work, so be patient as your soil gradually becomes more balanced.

Lowering Your Soil's pH (Increasing Acidity)

If your soil is too alkaline, you can lower the pH by adding sulfur or peat moss.

Sulfur is a stronger acidifier, while peat moss also enriches your soil with organic matter.

Here’s how to adjust the pH depending on your soil type:

Sandy Soil: To lower the pH by one point, you’ll need about 1-2 pounds of elemental sulfur per 100 square feet. Since sandy soils are more porous, they require less sulfur to make changes.

Loamy Soil: For loamy soil, use 2-3 pounds of sulfur per 100 square feet to lower the pH. Loam’s balanced texture responds well to moderate amounts of sulfur.

Clay Soil: Clay soils need more sulfur because they’re denser. Apply around 3-4 pounds per 100 square feet to lower the pH by one point.

How to Apply Sulfur

Mix the sulfur into the top few inches of soil, and then water it well to kickstart the process.

Just remember, sulfur works slowly, so it might take a few months before you notice a significant change in the pH.

When Native Soil Isn’t Enough: Consider Raised Beds

Even with soil amendments, your garden’s native soil might not always be ideal for certain plants.

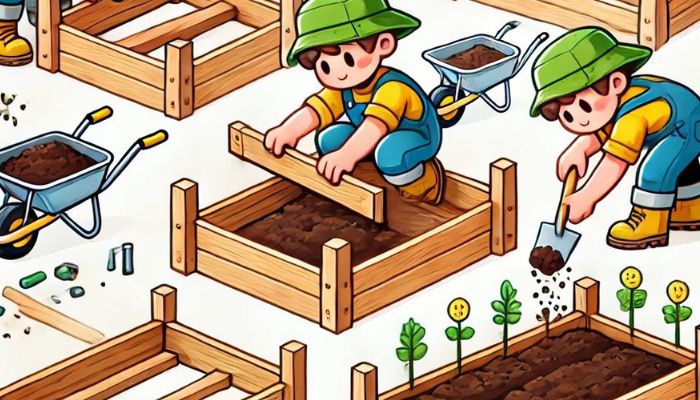
That’s where raised beds come in—they give you more control over the soil conditions.

Benefits of Raised Beds

Customized Soil: You can mix up the perfect soil blend for your plants.

Better Drainage: Raised beds naturally drain more efficiently, which is especially useful if you’re dealing with clay-heavy soils.

Easier Pest and Weed Control: Since raised beds have clear boundaries, it’s easier to keep pests and weeds at bay.

Great for Small Spaces or Poor Soil: If space is limited or your native soil quality isn’t great, raised beds are a fantastic option.

By using soil amendments along with raised beds, you can create a healthy, thriving garden, even if your native soil isn’t ideal.

Benefits of Raised Beds

Ensuring Your Garden Stays Hydrated

A steady water supply is key to a thriving garden since most plants need consistent moisture.

In this section, we’ll talk about how to keep your garden well-watered, ways to conserve water, and why proper irrigation is so important.

The Importance of Water Proximity

Watering might sound straightforward, but getting the right amount of water to your plants at the right time is crucial for their growth.

The closer your garden is to a water source, the easier it’ll be to keep your plants hydrated.

Convenient Water Access

When choosing a spot for your garden, consider how close it is to a faucet or other water source.

If it’s too far, keeping your plants watered—especially during hot summer months—can quickly become a chore.

Using Garden Hoses and Extensions

If your garden is a bit farther from a water source, don’t worry.

You can use hoses, sprinklers, and extensions to make sure every part of your garden gets the water it needs.

A good-quality hose that reaches the whole garden is worth the investment, and using a hose reel or cart can make storage and transport much easier.

Considering an Irrigation System

If you have a larger garden or live in an area with irregular rainfall, installing an irrigation system can be a game-changer.

It ensures your plants get consistent moisture without needing to water them by hand every day.

Drip Irrigation

Drip irrigation is one of the most efficient ways to water your garden.

It delivers water directly to the plant’s roots, cutting down on water waste from evaporation and runoff.

This method works especially well for vegetable gardens, raised beds, and containers.

Soaker Hoses

Soaker hoses are another great option for garden beds.

They slowly release water along their length, allowing it to seep into the soil and reach the plant roots.

Installation is easy—just lay the hose along the base of your plants, hook it up to a water source, and turn it on.

Benefits of Raised Beds

Harvesting Rainwater: A Sustainable Watering Option

Besides traditional watering methods, harvesting rainwater is a simple, eco-friendly way to keep your garden hydrated.

Rainwater is free from the chemicals and salts often found in tap water, making it a great choice for organic gardening.

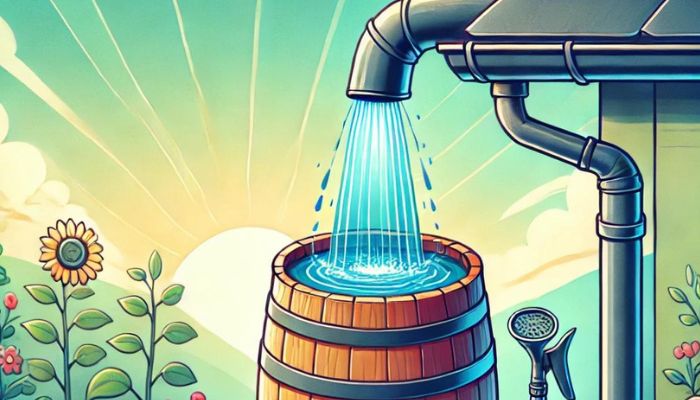
Setting Up a Rain Barrel

A rain barrel is an easy way to collect and store rainwater from your roof.

Just place the barrel under a downspout, and you’ll have a supply of water ready to use during dry spells.

You can even connect the rain barrel to a drip irrigation system or use it with a hose for manual watering.

Benefits of Harvesting Rainwater

Lowers your water bill

Helps conserve natural resources

Provides chemical-free water for your garden

Brandon Franklin

Brandon Franklin

Howdy! My name is Brandon, but my boys call me BFrank. I was born and raised in South Florida. Years ago I discovered gardening because I wanted to have more control over the food my family consumed at home and reduce our reliability on the supermarket. @ Meet the Gardener